사용한 스프링부트의 버전은 2.4.4 입니다.
저의 경우 환경별로 AWS RDS가 있기때문에 환경별로 따로 설정을 해주어야 합니다.
우선 환경별로 사용할 application.yml 파일을 준비합니다.
저는 dev, prd에서 사용할것이기 때문에 2개를 준비하였습니다.
파일의 위치는 resources아래에 위치해 있습니다.
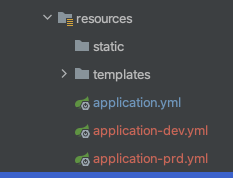
application-dev.yml
spring:
  config:
    activate:
      on-profile: dev

  mvc:
    hiddenmethod:
      filter:
        enabled: false

  datasource:
    url: jdbc:mysql://board-project-dev.cg2hxamogcbp.ap-northeast-2.rds.amazonaws.com:3306/board?autoReconnect=true&useUnicode=true&serverTimezone=UTC&characterEncoding=UTF8
    username: username
    password: password
    driver-class-name: com.mysql.cj.jdbc.Driver

  jpa:
    hibernate:
      ddl-auto: update
    properties:
      hibernate:
        show_sql: true
        format_sql: true
        use_sql_comments: true

  thymeleaf:
    prefix: classpath:/templates/
    suffix: .html
    cache: false

  loggin.level:
    org.hibernate.SQL: debug

server:
  port: 9090
application-prd.yml
spring:
  config:
    activate:
      on-profile: prd

  mvc:
    hiddenmethod:
      filter:
        enabled: false

  datasource:
    url: jdbc:mysql://board-project-prd.cg2hxamogcbp.ap-northeast-2.rds.amazonaws.com:3306/board?autoReconnect=true&useUnicode=true&serverTimezone=UTC&characterEncoding=UTF8
    username: username
    password: password
    driver-class-name: com.mysql.cj.jdbc.Driver

  jpa:
    hibernate:
      ddl-auto: update
    properties:
      hibernate:
        show_sql: true
        format_sql: true
        use_sql_comments: true

  thymeleaf:
    prefix: classpath:/templates/
    suffix: .html
    cache: false

  loggin.level:
    org.hibernate.SQL: debug

server:
  port: 9090
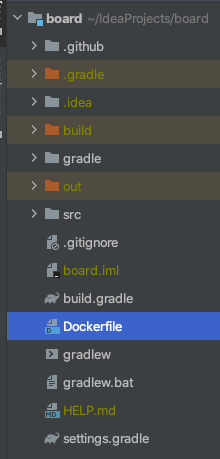
그 다음 Dockerfile을 작성해 줍니다.
Dockerfile의 위치는 루트 바로 밑에 있습니다.
그 다음 Dockerfile 안에 아래와 같이 작성해 줍니다.

작성한 Dockerfile로 이미지를 만들어 줍니다. 아래와 같은 명령어로 입력해주세요
docker build --build-arg ENVIRONMENT=dev -t 이미지이름 .
Dockerfile에서 선언해놓은 ENVIRONMENT로 dev값을 주고 docker run을 하게되면 위에서 설정해놓은 application-dev.yml 파일의 설정으로 동작하게되고 만약 ENVIRONMENT의 값을 prd로 주면 application-prd.yml 파일의 설정으로 동작하게 됩니다.
'스프링 부트' 카테고리의 다른 글
| 스프링부트 게시판 API 만들기 - 4 (게시글 수정, 삭제 테스트 코드 작성) (0) | 2021.04.23 |
|---|---|
| 스프링부트 게시판 API 만들기 - 3 (게시글 수정, 삭제 코드 작성) (0) | 2021.04.22 |
| 스프링부트 게시판 API 만들기 - 1 (환경 설정, 게시물 가져오기, 게시물 등록하기) (0) | 2021.04.21 |
| Thymeleaf와 @ControllerAdvice를 활용하여 원하는 에러페이지 만들기 (0) | 2021.04.19 |
| 스프링부트] CK Editor4 이미지 드래그&드롭 기능으로 AWS S3 이미지 업로드하기 (0) | 2021.04.16 |